Tuesday, September 8, 2009

Week 10 - Bounce Down Your Track!


Hurray! You're on the home stretch! The last thing you need to do to finish your song is bounce it down and send it to me - both I'm Yours and your own project.

Here are the
steps:
  1. Go to the Share Menu - choose Export To Disk
  2. Choose Compress - mp3 (don't worry about any other setting) - click Export
  3. When you save it, SAVE IT WITH YOUR FULL NAME so I can give you credit for it.
  4. Once it mixes down and exports, e-mail it to me at aliciamorgan@gmail.com with a sent time stamp no later than 5:00 PM Monday, Sept. 14 (Week 11)
Then you have the written test on Monday - from 1-5 pm here in the Passage Lab.

That's all! See you Monday!

Read on...

Monday, August 31, 2009

Week 9 - Audio File Format Basics

The last bit of new information that we will be getting into before the end of this class is Audio File Formats in GarageBand. This is a duplicate of what is in your Week 9 handout.

What is an ‘Audio File Format’?

There are many different kinds of sound files, or ‘audio files’. ‘Format’ is the word used to describe what type of file it is – what company developed it, what applications or programs can play it or use it, what has been done to it since it was originally recorded.

If you have ever used a computer for music, you have heard of an .mp3, but you might not have known exactly what that means – to most people, it’s just a name for something you listen to on iTunes or an iPod.

An .mp3 is an audio file that has been compressed, or had parts taken out of it, so that it can be small enough to send by email, or so that you can have room to store more of them on your drive or music player. It’s kind of like a trash compactor – the file is kind of squished down so it can fit into a smaller space. The parts that are removed to do this are mostly parts that you don’t miss – you can hear the difference between a compressed and a non-compressed file, but for casual listening purposes you’re choosing lower quality so you can have smaller files which are easier to store and send.

There are dozens and dozens of audio file formats, but we’re not going to get into them here. We’re going to discuss the formats that are used in GarageBand, which also are used by other audio recording programs and players.


Uncompressed Audio:

Uncompressed audio is audio that is kept the way it’s first recorded – not squished down. The two basic kinds we deal with in computer music are AIFF and WAV files. They are identified by their extensions – the three letters that come after the dot in the name of a file. For instance, a Word document’s extension is .doc. An Adobe Portable Document File’s extension is called a .pdf, which is a file type that can be read by almost any computer and program. The file extension is how programs can recognize whether they can use a file or not. Sometimes, all you have to do to get a program to be able to read a file is by just manually changing the letters of the extension!

A WAV file and an AIFF file are both uncompressed. The WAV extension is.wav, and the AIFF extension is .aif or sometimes .aiff. There is a slight difference in quality – overall, WAV files are a little better quality – but they can both be used to burn to CD. WAV is a format that is PC-Windows-based, and AIFF is Apple’s own CD-quality format. Most music programs (both Windows and Mac) now recognize both, but in the past, Mac programs would only recognize AIFFs so you would have to convert a WAV to an AIFF in order for a Mac to use it.

The reason to use WAV or AIFF files is for both quality of sound and ability to burn to CD.

Compressed Audio:

The reason we compress audio is to make the file smaller. The goal is to get a file as small as you can without compromising the audio quality too much. An uncompressed audio file – AIFF or WAV – is roughly 10 megabytes (MB) for each minute of audio. A four-minute song, for example, runs around 40 MB.

This can take up a lot of space on your hard drive or your portable audio player. But if an audio file is compressed using the .mp3 format, it shrinks to about 10% of its original size, with only a slight loss of quality to the ear. So, if you have room for 10 songs uncompressed, you have room for 100 if you compress them!

Apple uses the compression format called AAC (Advanced Audio Coding) for its iTunes songs. The extension for an AAC file is .m4a. These can be copy-protected, which is why they use it. It is a slightly higher quality compression but takes up the same amount of space. However, you can have AAC files that are not copy-protected as well.

The most popular compression method is, of course, .mp3. You can choose to export your GarageBand songs either as uncompressed AIFF (CD-burn-ready) or compressed .mp3 (standard) or AAC (iTunes standard). When you choose a compression type, you can also choose the quality of the compression – the less compression, the better the sound quality, but the bigger the file.

So, when you choose a compression quality, you are balancing which is more important – small file size or sound quality. For instance, compression at 64kbps will give you a very small file, but lower quality; 192kbps wil give you a larger file but better quality. It totally depends upon your needs for that file.

GarageBand audio exports:

– AIFF – Mac uncompressed, CD-quality, 10 mb per minute of song - .aif
– Mp3 – standard compression, 10% of Aiff or WAV – 1 MB per minute of song - .mp3
– AAC – itunes standard compression , 10% of aiff or wav – 1 mb per minute of song - .m4a

Read on...

Monday, May 4, 2009

Week 5 - Meeting Finale

This week, we are going to get acquainted with Finale and learn about the basic tools. Over the next 3 weeks, we’re going to learn the three basic methods of inputting notes – Simple Entry, Speedy Entry and Hyperscribe. For a practice project, you will be using the chart you worked on earlier for your demo. This will not be a finished project, just a way to learn to use the Finale tools.

When you open Finale, you will go to File→New→Document with Setup Wizard.

You will follow the instructions to set up your document. Under Select an Ensemble, you will goto Create New Ensemble, and then we will choose Jazz Font. Click Next.

Here is where you will add all the information about your song. You can also edit this later on by choosing File Info... from the File menu.

When you have finished this, your chart will be ready to go. There are 3 viewing modes – Scroll View, Page View and Studio View. The way yours will come out when you first start it is determined in the Preferences, underneath the Finale 2008 menu on the top far left of the screen. Some of the workstations seem not to have Preferences listed – perhaps because they are volume licenses. If you don’t have Preferences don’t worry about it. You can change the view from the View menu, or use the key command .

If you finish this before class ends, go ahead and start messing around. We will start entering notes as a class tomorrow.

For more information about getting your chart set up, go to this page.
It is using a different song but the steps are laid out for you.


Read on...

Tuesday, April 28, 2009

Week 4 - Finishing Lead Sheets, Finale Next Week

Your finished Lead Sheet is due next Monday - Week 5. This week, get your lead sheets ready to turn in. You will need:
  1. Your draft version (pencil)
  2. Your final version (pen)
  3. A copy of your original commercial sheet music that you used to make your chart from
If you only have the one copy, give it to me and I will hand it back to you after checking it.

This will be your Mid-Term grade.   

Next week - Week 5 -  we will be starting Finale, the music notation program. This is going to be more challenging than what we've been doing so far, so be prepared!

We're going to re-choose workstations that you will stay with for the rest of the quarter. If you like the one you have, stick with it. If you choose a new one, you will need to set up your own personal folder in Documents again, and keep all of your data on - don't forget, these computers are used by other people who may not be as file-management-conscious as you are! People lose their data all the time, and erase other peoples' as well, so make your own folder, and then back it up onto your flash drive.

For Finale, you must have:

  1. Headphones
  2. A flash drive to back up your work onto
Make sure that you have both of these.

Have a great week - I'll see you next Monday!

Read on...

Sunday, April 26, 2009

Week 4 - Lead Sheet - the Finished Product

So far, we have a rough draft of our lead sheet. This week and next we will clean up the lead sheet to make a good-looking chart that is easy for any musician to read.

There are a few things to keep in mind as you make your final copy:

  • Write your final version lightly in pencil, then trace over it in pen. Use a pen with blue or black ink (Sharpie Calligraphy pens are what I like best)
  • At the beginning of the chart, write the clef, the key signature and the time signature on the first staff only! Every other staff can be left blank.
  • Give your players the info they need, such as feel, tempo, what instruments are played when (example: "medium rock feel", "First verse piano & vox only; band in on second verse")
  • If there is a signature intro line, write out the melody in notation - usually one staff only.
  • Make sure you are clear about sections - write Intro, Verse, Pre-Chorus, Chorus, Solo, Outro (or whatever other sections you may have) to clearly mark where those sections are.
  • Arrange your measures so that each section starts at the far left of the page. It is okay to have a different number of measures in each staff, so long as it enables the sections to start at the far left. If you only have four or six measures on a second (or 3rd) page, see if you can distribute those measures among the ones on the previous page(s) so you won't have an extra page with only a few measures on it.
  • Write neatly!
  • Make sure you write chords large enough for your players to be able to read at a distance! Remember that they will probably have your chart on a music stand and will need to have everything written large, clear and uncluttered. Your chart could be perfect, but it won't make a difference if your player can't see it. So, even if your normal handwriting is small, for your chart, make it larger.
  • You do not have to write lyrics; however, if there are places where it would help the players to know a lyric, you could write the first couple of words in the phrase followed by an ellipse(…) just to let them know where they are in the song - especially if it is repetitive, or the verse and chorus sound the same.
  • Double-check to make sure your graphical and text repeats work for the song structure. Make sure they are easy to see. I usually put little curved lines on my repeat signs to make sure they are eye-catching. Same with your codas and signs - make sure they are noticeable by your player.
These things will help you put together a great chart. We will talk more about this in class.


Read on...

Monday, April 20, 2009

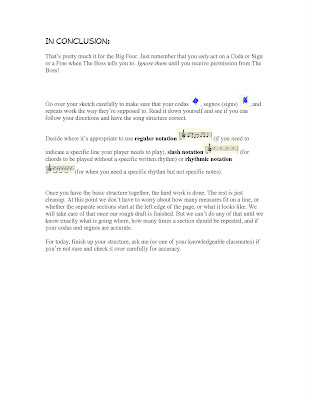
The Big Four - Back By Popular Demand!


Click each page to view or download!

Read on...

Wednesday, April 8, 2009

Welcome, My Spring Chickens!

Hi all - this is our introductory post for the Spring 09 quarter of Arranging For Singers 'A'.

Our first assignment, for next Monday (week 2), is to bring in a piece of commercial sheet music - it can be something you buy, or scan out of a book, or check out of the library, or something you aready have. It needs to have lyrics, chords, and a piano part. What we will be doing is condensing it into a chord chart, which we will be writing by hand.

I'll be updating this on a regular basis. In the meantime feel free to browse the rest of the site - theres a lot of info there that we will be using later on in the quarter. And don't forget to sign up on our Facebook group!

If you have any questions about anything we're doing, please don't hesitate to get in touch with me any time - by a comment on the blog, an e-mail, a text message or through Facebook.

See you Monday!

Read on...